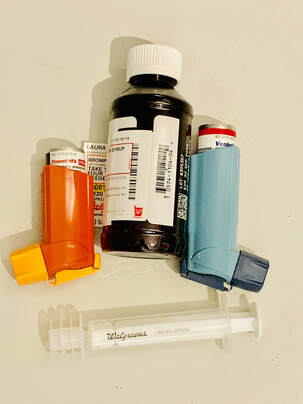
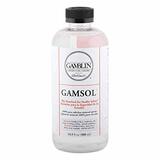
  Yesterday, after a 6-week battle with bronchitis, I dragged myself back to the doctor for a second visit and left with three prescriptions. I am now the owner of two inhalers and one bottle of really expensive (insurance didn't cover it) cough syrup for my non-stop coughing and wheezing. I've already noticed a difference overnight, so things are moving in the right direction. Why am I telling you this? Because part of the reason I've been coughing and wheezing is due to prolonged exposure to odorless mineral spirits (OMS). I noticed at some point last semester, while my students were gagging from the smell of someone's open container of Sansodor, that I didn't smell anything. I had become immune to the odor, but my tongue felt numb and my lungs were aching. Typically, I paint in my studio which has ventilation. I use Rublesol or Sansodor to thin my paints for my first layer of painting (the underpainting), then only use thinners for cleaning my brushes. For several years I have been aware of the dangers of fumes from OMS, turps and Liquin. To control my intake of fumes, I switched to using dropper bottles, controlling the amount of OMS I use, and asking students to use metal palette cups that come with those lids that stop working after a few months. This has helped to some degree. By laziness, I started rinsing my brushes in oleogel that usually lives on my palette. While I don't recommend this method now, it did help that I didn't have to open my OMS to rinse out my brushes. Here's the good part. I'm changing my habits toward a healthier painting environment and have some good information for you on how to easily make the switch so you'll lessen your chances of having to own two inhalers and cough syrup (that isn't even the fun kind). Part 1: Here are the basic products you'll want to avoid using as much as possible because these things give off fumes - some that go unnoticed, some you grow immune to smelling, but all of them can make you ill. A. Turpentine B. Odorless Turpentine C. Liquin Part 2: Here is what you can replace your underpainting with, while still following the "Best Painting Practice" methods: A. Instead of using turps to thin your paint, use only the paint and apply it thinner. This may include scrubbing the paint onto your support with a hogs hair brush. I recommend using earth colors that have the reputation of drying quickly for this stage. This means avoid alizarin crimson, or your underpainting will be wet for quite a while... B. Paint your underpainting using matte Golden paints. Why Golden? Because they're the ones that came out with the first readable technical sheet explaining why this is a safe practice for oil painters who want to create less toxic underpaintings. Click HERE to see the link to their technical bulletin. If you use this method, I still recommend using a thin, sparse amount of matte acrylic paint and allowing it to dry up to 48 hours to make sure all the water has evaporated before putting oil paint on top of the acrylics. Bonus - you can use a quinacridone (replacement for alizarin crimson) and it's likely going to dry just as fast as any earth color in acrylics! Part 3: Keep your brushes clean. I have never met an artist who loves cleaning their brushes. There are about two million ways to clean your brushes. I've read most of them. I'm going to cover a few of my favorite methods. If you have a favorite method that I didn't list below and it doesn't cause your lungs to feel like they're filled with tumbleweeds, good on you! Keep it up. While you're painting: 1. Use a different brush for every color. While this isn't very helpul, if you're super-lazy at your easel, you might like this option. 2. Wipe out your brush with a towel or cloth, then swish it around in a vegetable oil. I prefer to use whichever oil is in my oil paints to keep everything working properly. I don't want to introduce a "drying oil" if my paints do not contain drying oil. For this process, I'm using plain old linseed oil. Feel free to wipe your newly cleaned brush with a cloth after the swish so you avoid adding any unwanted "fat" medium to your oil paints. After you finish painting: 1. Wipe off your brush with a cloth or towel. Rinse your brush in any of the following: Safflower oil, Linseed Oil (note: drying oils may stiffen your bristles), Murphy's Oil, Dawn Dish Soap (Fairy Soap), Zest it!, or Natural Turpenoid (in the green can/green label - This is a non-drying oil and needs to be completely cleaned out of your bristles or your oil painting may never dry). I recommend putting any of these things into a glass coil jar. The good news is that the lid won't disintegrate as quickly as it does with turps! 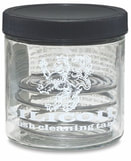 2. Rinse/Wash out your bristles. It is important to get rid of any soap or residue lurking in your bristles that will add unwanted "mediums" to your paint. A final wash to your brush could be with the following: Master's Brush Cleaner or any bar of non-fancy soap (Free from frangrances, added vitamins, etc.). If you've used Murphy's oil soap, or dishwashing liquid, simply rinse your brush under warm water. Reshape your brushes after you wash them and let them dry. *Folks at the Florence Art Academy like to swirl their clean bristles in their own spit, shape the bristles, wrap them in a tiny piece of paper towel and let them dry. (Eww! And...it works.) 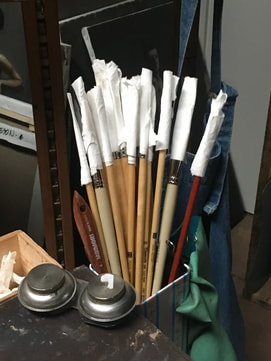 A couple of side notes:
1. Do not use acrylic brushes for oil paint. The two should never meet. However, if you use acrylic brushes in oil, they are forever oil brushes. If you use an oil brush in acrylic paint...well, that sucks. 2. Remember those rags I was talking about? These are the MOST DANGEROUS part of painting, with exception of eating your paint and drinking your OMS. The best way to manage these rags in a studio is to get an airtight container, fill it with a couple inches of water, throw used rags, paper towels and gloves in the container and put a lid on it. Oil + rags + air = fire This is a real danger that can easily be averted. I purchased a small aluminum bin with a lid from Lowe's Hardware store and caulked the bottom so it wouldn't leak. Get yours at your favorite store. Fill the bottom with a couple of inches of water. I empty my bin every couple of weeks. I'll put on a pair of gloves, dump all the wet mess into a plastic bag and bring it out to the dumpster immediately. When visitors leave half-used bottles of water in my studio, I just dump them into the can. Adding more water to oil rags can't hurt. I hope this helps to keep you healthier, your studio safer and prevents others around you from getting ill from paint fumes. Paint on, rockstars! Want to read more? Here's a 2-part article with more information: Part 1 - https://www.trac2019.org/…/painters-toxicity-part-1-by-dav…/ Part 2 - https://www.trac2019.org/2019/…/02/painters-toxicity-part-2/ Still on Facebook and want to be part of an active community of paint-problem solvers? Or, have a specific question related to oil painting? Follow "Best Painting Practices". It's a great resource of non-stop information!
1 Comment
|
AuthorLaura Spector is a visual artist and art instructor living in Houston, always willing to travel. Archives
May 2019
Categories |
 RSS Feed